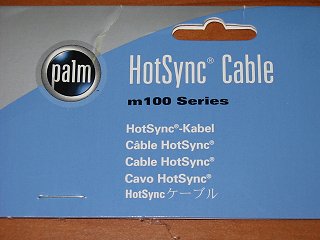
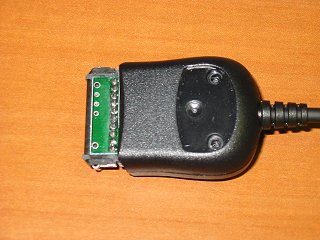
This tutorial is meant to be used in the construction of a USB cable to connect the Dakota Digital Single-Use Camera to your computer. Recently it has become possible to quickly download pictures from the camera and reset (erase) it for continued use. This example uses a fairly easily obtainable Palm M100 HotSync cable and a USB cable that fits your computer (most likely a USB type A male). In my particular case I found the Palm cable online at eBay and a 10' USB cable at a local surplus store.
Total cost for my project was $4.99 for the Palm cable (includes shipping) and another $4.99 (plus tax) for the USB cable. (I didn't try that hard and I still managed to keep the cost below the price of the camera!)
I have recently noticed (8/2004) at least two people on eBay selling a kit or a completed cable which appears to be based upon my design. I am not affliated with the eBay usernames of "geoffk" or "dumnhappy", or anyone else on eBay selling these cables. I have never sold my design or constructed cables for anyone else. If you have bought one of theses cables from an eBay seller and it appears very similar to my design, I would appreciate you sending me an e-mail (address is at the bottom of this page). Thanks!
Another item along these lines came to my attention Sept 2004. It appears that this page has been cloned onto a site at Jeffraysbrain.com without my permission. I found it while searching Yahoo!. I sent a "cease and desist" request to the owner and the link was taken off his publicly available page, but this URL is still active. He told me that he was sent this information via e-mail and that "this was not my fault because someone gave it to me as a post to my site". The copy that he had posted was one that existed prior to July 15, 2004 when I changed my image hosting. I told him that I don't mind being linked to but that as someone who has taken the trouble in posting a COPYRIGHT NOTICE on his own site, and then DEFINING what that means, I think that he should have known better.
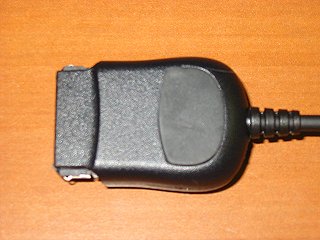
The first step is to take apart the shell around the Palm end of the HotSync cable. After struggling for a few minutes trying to pry it apart with my fingers, I finally figured out that screws were holding it together (duh!). Pry off the rubber piece and you will find two Torx T5 screws.
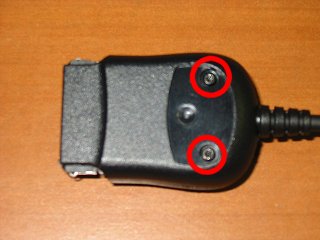
Not having that small of a Torx screwdriver on hand I used a small jewelers screwdriver to remove the two screws.
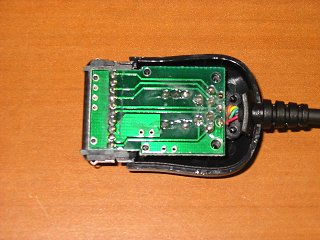
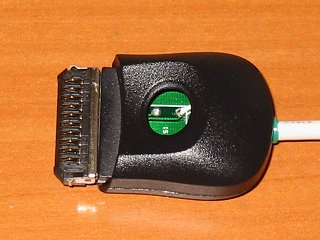
Inside you will find a PC board containing a capacitor and pushbutton switch (I'll get to those later). Second step was to trim off part of the shell that prevents you from plugging the Palm connector into the Dakota camera. Using my trusty Dremel and a cutting wheel...
Next step is to remove the circuit board from the shell. It simply lifts out. Looking at both sides...
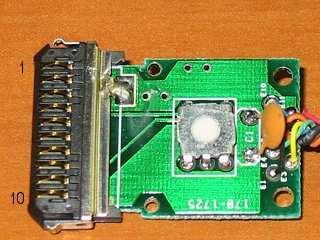
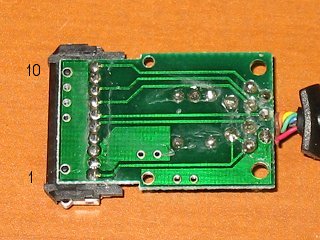
you can easily see where the four important traces are going. In our case, pins 6, 8, 9, and 10 are going to be used. Using a pair of diagonal cutters just clip out both the capacitor and switch. Unsolder all of the wires from the original cable and discard the cable (unless you need it for a serial port somewhere). Clip off the un-needed end of the USB cable, in my case it was a USB B-type. Strip and tin the four wires.
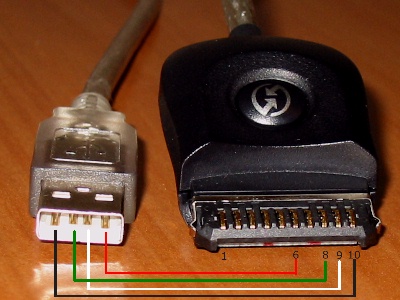
The following table shows the connection of the four USB wires:
| Palm connector | USB Func | USB Color | PC Board |
| 6 | +5v | Red | E5 |
| 8 | Data+ | Green | E3 |
| 9 | Data- | White | S1 |
| 10 | Ground | Black | E1 |
The following pictures show the connections...

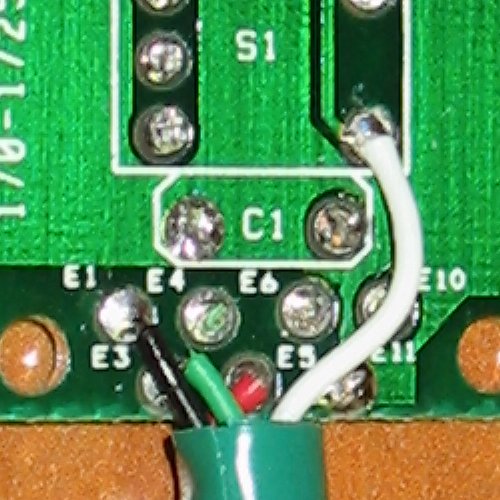
I wrapped some tape around the cable where it enters the shell for use as a strain relief. Re-assemble the shell and you're done!
The "hole" in the shell is because I also removed the plastic pushbutton assembly since it wasn't needed. I suppose since the switch was taken out I could have left the plastic piece in but I left it at work.
I was asked to show the wiring of the connectors in case a non-standard USB cable is used.
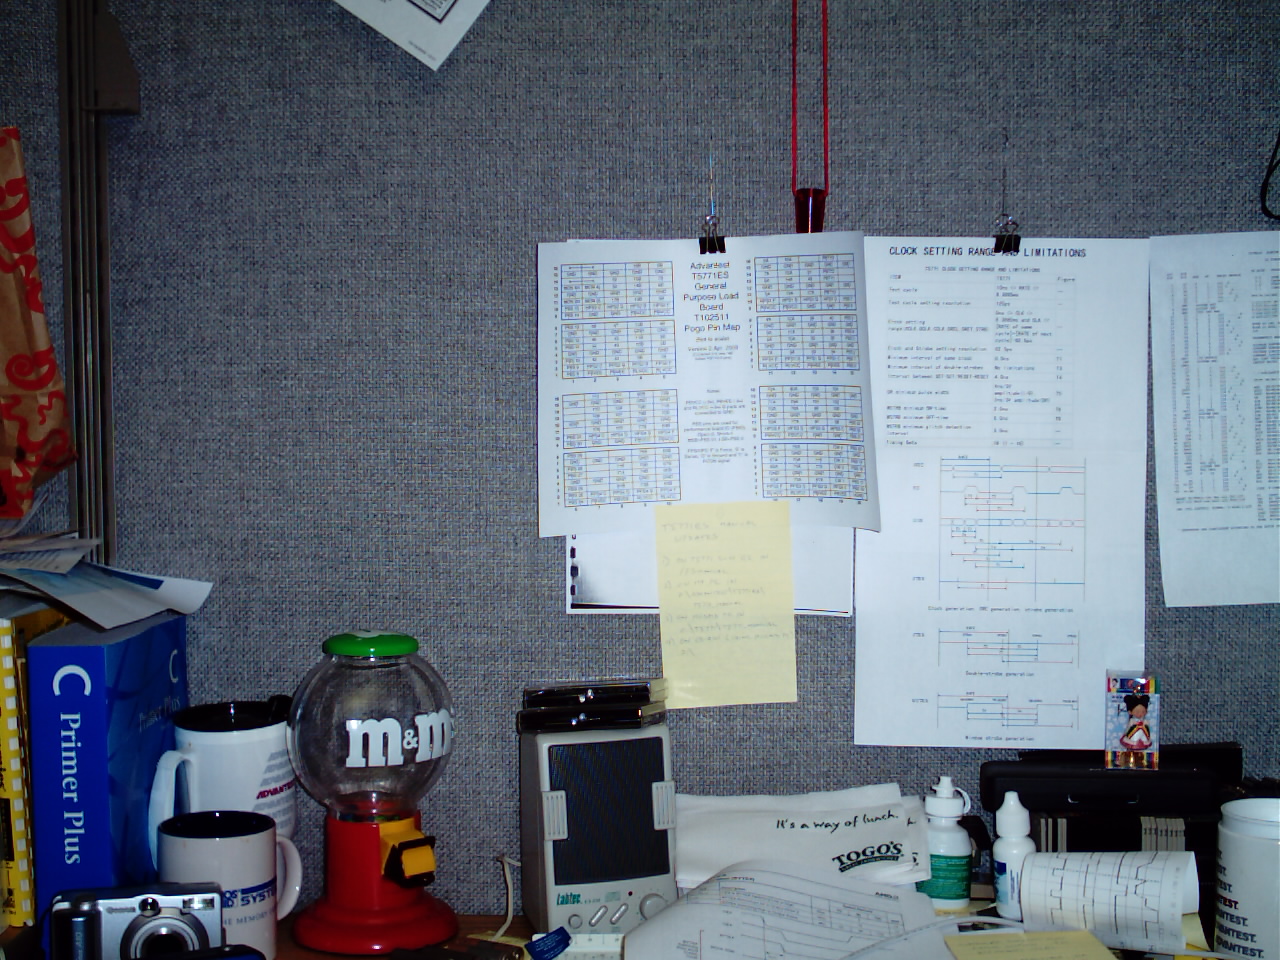
The first picture was taken using the Dakota Digital camera and has not been re-touched or altered in any way. File size is 520KB.
The next picture was taken with my Canon A10 using large resolution (1280 x 960, the same as the Dakota) and Superfine (lowest) compression. File size is 596KB.
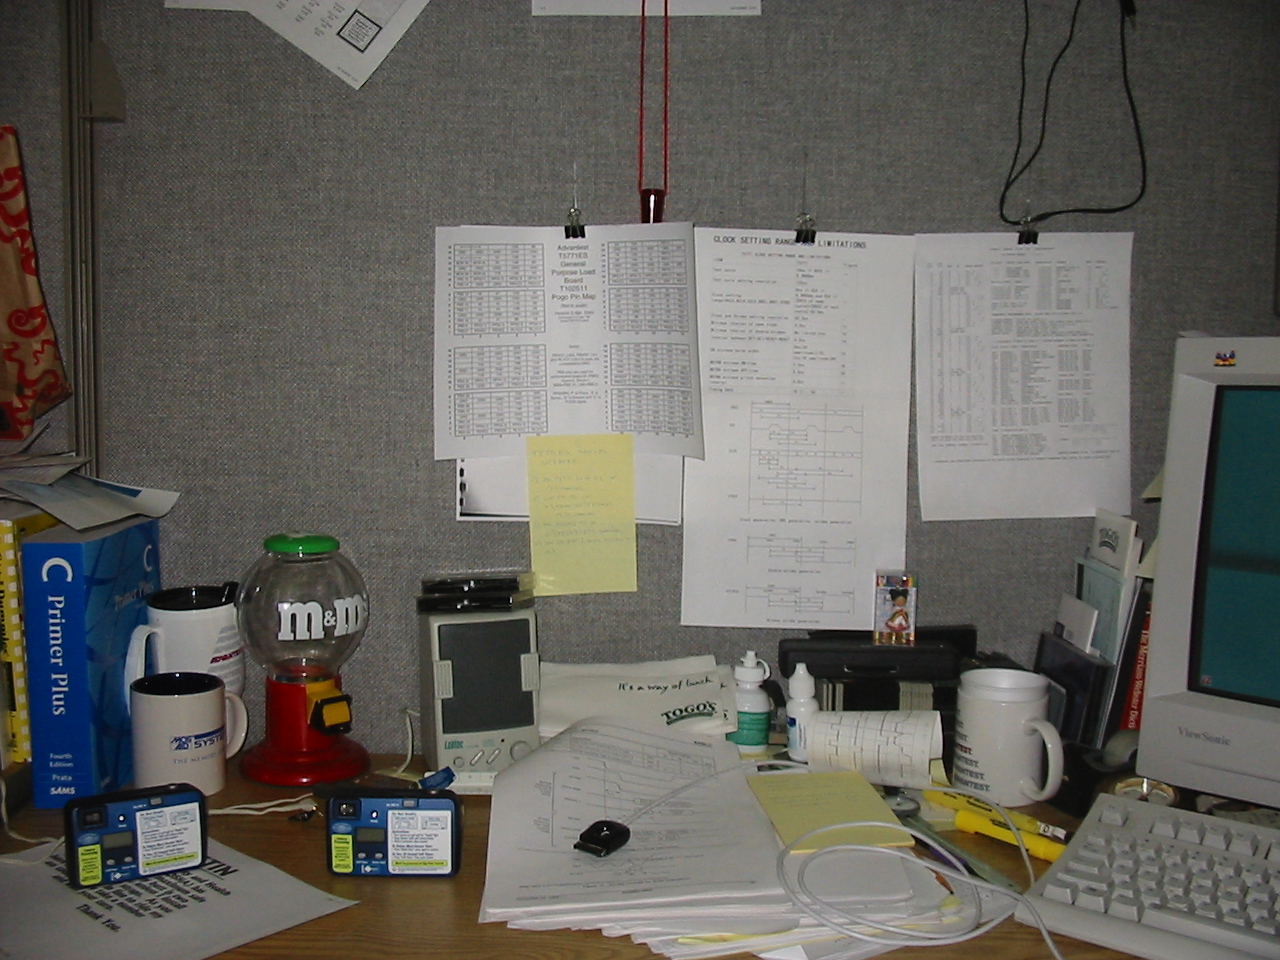
Distance to the cubicle wall was about 5 to 5 1/2 feet. Flash was used in both cases. I did not try to match the zoom setting of the Dakota with the Canon; I believe it was left at maximum wide angle. Pictures were downloaded using the Windows program on a Win98 system. I tried to install the software on both Win95 and WinXP systems but couldn't get it to work.
I understand that many people have been contributing to this project. I have used
the following sources to assemble my cable and download pictures out of the camera: